A new water heater changes the daily rhythm of a home. Showers hit the right temperature without games at the tap. Dishes and laundry get cleaner with less fuss. But the relief only lasts if the system gets the kind of care that keeps it efficient, safe, and under warranty. In Taylors, where summer humidity and winter cold can both work on a utility room, post-installation habits make a clear difference in performance and lifespan.
What follows comes from seeing hundreds of units installed and maintained in this area, from crawlspace tank swaps off Main Street to garage-mounted tankless installs east of Wade Hampton. The make and model matter, but the environment matters as much. After replacement, the first 90 days set the tone. The first year proves whether the install and owner routine were done right.
The first 48 hours after installation
After a proper water heater installation, most homeowners want to crank the dial and enjoy hot water. That’s fine, as long as the first run is deliberate. With a tank-style heater, expect a full heat-up in 30 to 60 minutes for gas, 60 to 90 for electric, depending on tank size and inlet water temperature. Tankless units stabilize after a few minutes of steady demand.
Watch for two things during the first two days: leaks and combustion or electrical issues. A small drip at a union fitting often resolves with a quarter turn from a wrench, but persistent moisture at the temperature and pressure relief valve means thermal expansion or overpressure. If your home has a closed plumbing system and no expansion tank, the valve will weep during heat cycles and never seal completely. In Taylors, homes with pressure regulators on the main line often need an expansion tank sized to the heater. If your installer recommended one, and you skipped it, call back sooner rather than later.
For gas units, stand near the draft hood or vent connector during a hot-water draw. You want steady upward draft, not a backdraft warming your face. If you smell gas at the valve or union, do not try to relight anything or flip the switch. Close the gas shutoff, ventilate the area, and call the installer. For electric units, verify the breaker holds during a full heat cycle. A nuisance trip points to a marginal breaker, water heater service taylors undersized wire, or a miswired element.
Finally, check the mixing valve if one was installed. Many Taylors water heater installation jobs now include an anti-scald mixing valve, especially with higher-efficiency tanks that store water at 140 degrees to curb bacterial growth. If the shower feels lukewarm even with the tap wide open, the mixing valve may be mis-set or air bound. A technician can purge and calibrate it in minutes.
Dialing in temperature, safely
The federal guidance remains 120 degrees at the tap for general use. For households with immunocompromised members or where dishwasher performance struggles, storing at 130 to 140 with a mixing valve makes sense. It’s a trade-off. Higher storage temperatures reduce Legionella risk inside the tank and can improve appliance wash results, but they increase energy use and elevate scald risk at fixtures without proper mixing.
A simple check helps. Use a reliable kitchen thermometer in a mug at the nearest bathroom sink after a five-minute hot-water run. Aim for 120 at the tap. If you measure higher, turn down the thermostat a few degrees and recheck after an hour. If you measure lower, adjust up in small steps. On tankless models, the digital setpoint does most of the work. Keep in mind that winter inlet water in Taylors can drop to the 40s. A tankless unit set to 120 may struggle to deliver that at high flow without a slight reduction in gallons per minute. Setting to 125 during colder months can give headroom, but don’t mask an undersized unit with a higher setpoint if you’re constantly mixing cold to tolerate the shower.
Water quality in Taylors and what it does to heaters
Public water in the Taylors area is generally moderate in hardness, but well water pockets exist on the fringe, and even moderate hardness builds scale at 125 degrees and up. Scale settles on electric elements and heat exchangers first, then in the bottom of tanks. I’ve opened three-year-old electric tanks here with elements buried under half an inch of mineral. That adds noise, waste, and stress. It also voids warranties if neglected.
Two habits help. If you have a tank-style heater, flush a few gallons quarterly in the first year. Often, that’s enough to keep sediment loose so it can exit with a quick drain. If the drain valve clogs on the first flush, don’t force it. A clogged drain on a brand-new heater suggests heavy sediment or debris in the lines. Call for water heater service to clear it safely.
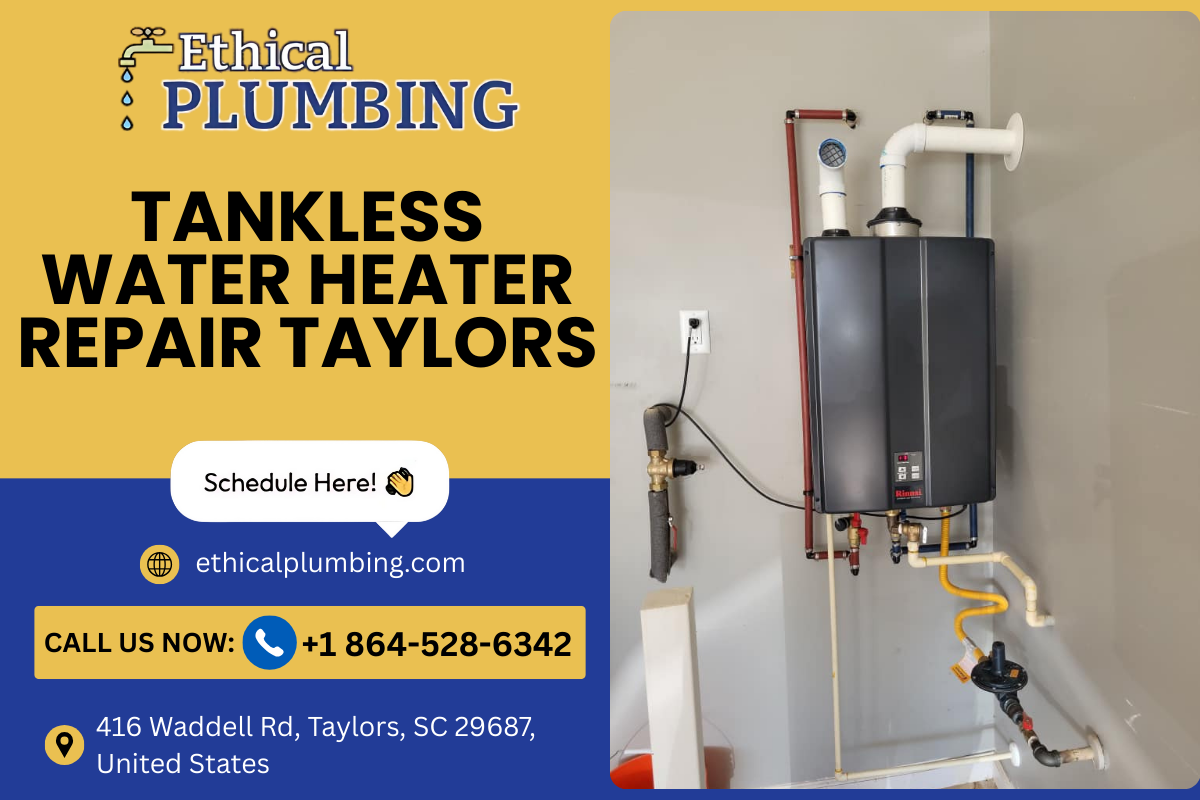
For tankless units, scale shows up as temperature fluctuations or error codes for flow and heat exchange. Tankless water heater repair in Taylors often starts and ends with a descaling. With hard water or a family that uses a lot of hot water, plan to descale once a year, sometimes twice. Isolation valves make this easy. Without them, the job takes longer and risks contamination. If your installation didn’t include isolation valves, add them before your first flush.
A whole-home water softener reduces scale dramatically, but it changes the chemistry inside a tank. Softened water can be more aggressive toward anode rods and certain brass fittings. If you soften, plan on more frequent anode checks and use the right anode type.
Anode rods, sacrificial parts, and when to check them
That magnesium or aluminum rod sitting in the tank’s top is there to corrode before the tank steel does. New tanks often tout long warranties. Many of those assume anode maintenance. In Taylors, with mixed water conditions, the first inspection at 2 to 3 years is reasonable for standard households, sooner if you soften water, use a recirculation pump, or notice a sulfur smell.
When an anode is more than 75 percent consumed or coated with calcium, replace it. Aluminum anodes resist rapid consumption in soft water but tend to generate a jelly-like residue that clogs fixtures. Magnesium protects better but can make hydrogen sulfide odors worse in certain water. A powered anode can eliminate both odor and consumption, but it adds an electrical component and cost. The right choice depends on your water, not the label on the box.
Anecdotally, I’ve seen budget electric tanks here with anodes gone in under three years on softened water. Those were homes that never checked the rod, then called for taylors water heater repair after a leak stained the garage. The second tank lasted longer with a powered anode and annual flushes.
Gas venting and combustion air in real homes
Gas water heaters need fresh air and a clear path for exhaust. In older Taylors homes, the heater lives in a closet that lost its door louvers during a remodel. That works until the heater tries to run with the HVAC pulling the room negative. The flame lifts, soot forms, and the draft spills. If your installer recommended adding combustion air openings or grilles, take it seriously. Soot at the draft hood, melted plastic near the vent, or a lingering combustion smell means a service call. Modern high-efficiency power-vented or direct-vent units need to breathe as well, but they pull outside air and exhaust through sealed pipes. Keep those terminations clear of mulch, spider webs, and snow, and watch for ice during rare cold snaps.
If your heater shares a flue with a furnace, the combined venting has to match the input ratings and rise. A water heater replacement that moves from natural draft to power-vent changes that equation. Good installers do the math. If the installer re-used a smaller flue and you notice delayed ignition, rumbling, or heat damage near the bonnet, have someone revisit the vent sizing. This is not a wait-and-see problem.
Electric elements and why they fail early
Electric water heaters are simpler on paper: two elements, two thermostats, one high-limit switch. Yet they fail early when installed on old wiring or run with sediment. Taylors has a fair number of 1970s and 1980s homes with aluminum branch circuits or marginal 30-amp breakers feeding a 4,500-watt tank. Loose lugs at the disconnect or panel heat up under load and burn a thermostat or element terminal. If you experience a breaker trip during the first long heat cycle, have the wiring evaluated. Many “bad element” calls are really bad connections.
If an element fails within a year in a home with mineral-heavy water, it probably cooked under an insulating layer of scale. A quick element check and a planned flush routine avoids the repeat. Stainless low-watt-density elements handle scale better than high-watt-density types and are worth the small extra cost if hardness runs high.
Relief valves, expansion tanks, and actual pressures
The temperature and pressure relief valve is a safety device, not a pressure regulator. If it drips routinely, don’t plug it, cap it, or pipe it uphill. Find the cause. The usual culprits in Taylors homes are high static pressure, a missing or failed expansion tank, or a water heater thermostat set unusually high.
Check static pressure at an outdoor spigot with a gauge. Many homes sit at 45 to 60 psi, which is fine. Some sit at 80 to 100, especially if a failing pressure reducing valve stopped reducing. Anything over 80 calls for a pressure reducer and an expansion tank sized to the heater’s gallon capacity and actual line pressure. Expansion tanks lose their air charge over time. A two-minute check with a tire gauge at the Schrader valve, with the system de-pressurized, tells the truth. If the air side reads 0 or is waterlogged, replace the tank. It’s a small part that prevents big messes.
Recirculation loops: comfort versus cost
Many homeowners add a recirculating pump during a taylors water heater installation to eliminate the wait for hot water at distant taps. These are great for comfort, and modern models with timers and temperature sensors reduce waste. Still, they add to energy use and increase corrosion potential inside the tank. If you have a recirc loop, set smart schedules and consider a demand-activated switch near the farthest bath. With a tankless heater, use a pump designed for tankless recirc or a buffer tank system that prevents short cycling. Otherwise, the unit will click on and off as the pump moves small amounts of warm water, which accelerates wear and creates nuisance noise.
Seasonal habits in the Upstate climate
Summer humidity sneaks into garages and crawlspaces. Cold water enters the tank and condenses on the cool shell, which can look like a slow leak. Wipe the jacket dry and watch for new wetness after the burner runs or elements cycle. If the “leak” dries after a heating cycle, you just had condensation. Installing a simple drip pan and routing its drain properly is still good practice, condensation or not.
Winter brings colder inlet water and occasionally space heating that pulls combustion air tight. In that season, a tankless unit will feel a little weaker at high-flow showers. Reduce flow a notch or increase the setpoint a few degrees. For a tank unit, winter cycles run longer. A blanket might seem smart, but most modern tanks already have solid insulation. Don’t wrap the top or bottom, don’t cover the burner compartment, and never cover the draft hood. If you can squeeze the tank and feel heat through the jacket, you probably own an older or budget model that can benefit from a properly fitted wrap. Otherwise, leave it.
Routine you can stick to
Post-installation care does not need a binder. A simple seasonal rhythm keeps things in line.
- Quarterly: glance at the tank or tankless body for moisture, rust streaks, and soot or scorch marks; test hot water temperature at a tap; if you have a tank, crack the drain for a gallon or two to flush loose sediment. Annually: check static water pressure at a spigot; if you have an expansion tank, verify and set its air charge to match your static pressure; replace or clean air intake screens on tankless units; schedule descaling on tankless and a full flush on tanks; inspect the anode rod at the two to three-year mark, then set the next interval based on what you find.
If a task feels unfamiliar, a water heater service call in Taylors typically takes under an hour for a straightforward checkup. Many companies bundle maintenance that resets warranties and logs serial numbers, which helps later if you need parts.
When to call a pro versus DIY
Plenty of owners handle flushing and temperature checks. Others prefer to hand it off. Here’s a useful line: if the job touches gas, venting, or 240-volt wiring, bring someone who does it weekly. If you see any of the following, plan on professional help rather than tinkering:
- Pilot failures, flame roll-out, or repeated error codes on a tankless display, especially codes related to combustion or heat exchange. Persistent dripping from the T and P discharge pipe or visible bulging on an expansion tank. Rust at the tank base or a dampness ring around a tank’s bottom seam.
Tankless water heater repair in Taylors tends to be straightforward if addressed early, but short-cycling left unchecked can damage fans and boards. Tank heaters reward early detection, too. A six-dollar anode inspection saves a thousand-dollar floor replacement.
Warranty fine print that actually matters
Most manufacturers tie extended warranties to proper installation and normal maintenance. For Taylors water heater installation, that usually means:
- A dedicated shutoff, code-compliant venting or electrical, a listed pan with a plumbed drain where required, and seismic or restraint measures if specified. For gas units, a sediment trap on the gas line and combustion air provisions. For closed systems, an expansion tank. For tankless, isolation valves and, often, a condensate neutralizer on high-efficiency models.
Keep the paperwork. Snap a photo of the serial number, the venting, and the expansion tank label. Log your maintenance dates in a notes app. If a tank leaks at year eight on a 9-year warranty, the difference between a covered and non-covered claim has often been that folder of photos and notes.
Energy habits that add up
Water heating is often the second largest energy use in a home. After replacement, you can shave 10 to 20 percent with simple moves. Shorten the average shower by a minute or two. Fix dripping hot-side faucets quickly, because they steal heat all day. Upgrade showerheads to 1.75 to 2.0 GPM models that still feel good. On a recirculation system, run on timers or demand rather than 24/7. If your dishwasher has a true internal heater, you can often set the water heater a touch lower. If it does not, run the tap hot before starting a cycle so the machine doesn’t try to wash in lukewarm water.
For tankless units, many owners run into the “low-flow no-fire” edge case at small handwashing flows. If you prefer low-flow lav faucets, choose models that do not fall below the heater’s minimum activation rate, typically 0.4 to 0.6 GPM on newer units. Otherwise, you’ll get a burst of heat followed by cool water as the unit cycles off.
A note on noise and what is normal
New tanks sometimes rumble faintly during heat cycles. That is usually sediment popping as water trapped between layers flashes to steam. After a couple of proactive flushes, it often quiets. Loud banging, known as water hammer, is a different issue. If you hear pipes slam when the washer closes a valve, add hammer arrestors at fast-closing appliances. Hammer can shake solder joints loose and stress tank nipples.
Tankless units make fan and ignition sounds. A faint jet-like whoosh is normal. Whining, rattling, or chattering is not. If noise increases over months, descaling is the first step. If it returns quickly, look at gas supply sizing or debris in the combustion air path.
Smart controls and realistic expectations
Some modern heaters ship with apps and smart thermostats. They can help by logging usage and letting you set vacation modes from a phone. They are not magic. If a family of five takes back-to-back long showers, a 40-gallon tank will run out no matter how smart the control looks. If you schedule a tankless unit’s recirculation on for eight hours a day, you will use more energy than a well-insulated tank in some cases. Use the tools to match your routine, then watch a month of bills to see if the changes paid off.
Working with local service without drama
When you search for taylors water heater repair or water heater service Taylors, you’ll find everything from one-truck shops to larger outfits. What matters after replacement is continuity. Choose a team that installed or at least documented your unit, keeps part numbers on file, and can book you within 24 to 48 hours for non-urgent issues. For urgent leaks or no-hot-water calls, ask about same-day windows. A good shop will also be candid about when repair beats replacement, especially for out-of-warranty tanks showing rust at seams or for older tankless units with repeated board failures.
If you’re considering upgrades, such as adding a mixing valve, isolation valves, or an expansion tank, pair those with scheduled maintenance. You pay one trip charge, and the system is safer and easier to maintain next time.
Edge cases worth calling out
- Vacation homes: Use vacation mode. For tank units without a dedicated mode, turn the thermostat to the lowest setting or off if you know how to relight or re-energize safely later. For tankless, ensure freeze protection has power if the space can drop below freezing. A surprising number of burst heat exchangers happen when owners flip the breaker to “save power” and disable freeze protection. Crawlspace installations: Moisture and critters are a reality. Elevate the unit if possible, use a pan with an alarm, and install a drain to daylight. Check that the combustion air isn’t pulling from a sealed crawl without proper vents. Old galvanized lines: A new heater can stir up debris. Clean aerators after replacement and be ready for a first-month filter change if you run a whole-home filter. Mixed-metal connections: Use dielectric unions where steel meets copper. If your installer used brass nipples with plastic-lined interior, that is common and effective. Corrosion at that joint in the first year is not normal and needs attention.
Putting it all together for long life
New water heaters, tank local water heater installation services or tankless, will often run a decade or more in Taylors if maintained. The ones that fail early have patterns: no expansion tank on a closed system, no descaling on tankless, anode neglect on softened water, or venting shortcuts on gas. The ones that last share patterns, too. The homeowners test temperature twice a year, they flush on a schedule suited to their water, and they treat error codes and drips as signals, not background noise.
If you just finished a taylors water heater installation, set two reminders in your phone: a quick 90-day check for leaks, temperature, and pressure, and a one-year service for flushing and inspection. If you run a tankless, add descaling to that appointment. If your installer left you with a folder, tuck a pressure gauge into it. The small habits are the difference between quiet performance and intrusive repairs.
And when something feels off, call a local pro who knows the area’s water and housing stock. Whether you need water heater maintenance Taylors families can rely on, or a fast tankless water heater repair Taylors techs do daily, prompt attention keeps small issues small. A water heater replacement is the starting line, not the finish. Treat it that way, and your home will have the steady hot water you expected when you made the investment.